Visit our websiite at www.artandsoulpreschool.com

Sunday, September 4, 2011

The Story of Making Mbiras

The Story of Making
Mbiras
(little thumb pianos)


I have this lovely CD called:

Four Legged Tales
Animal stories from Here and Away
Told by Laura Simms, Accompanied by The Real Myth Ensemble

It truly is a little gem that my family has loved and the children enjoy hearing during rest time.
One of my favorite stories on this CD is a Zimbabwe tale called Rabbit and Lion.

I have adapted this story many times in telling it with puppets at the school, however this summer my husband suggested making Mbiras.  I thought this was a wonderful idea. 
So the first task was to have the children paint a piece of wood.


The next step is to hammer flat bobby pins to use as the keys.
My husband then took chop sticks and staple gunned one to the top of the wood.
The reason we decided to staple the wood down was that it gave a little
flexibility under the wood to slide the keys in.

Once the keys are slid into place, put another chop stick underneath the keys.  You can glue this piece into place.  The keys do move around a bit, but this also allows the keys to be placed in different position to tune it.


After the Mbiras where complete, I played the story while doing the puppet show.  The children had never heard the recording of this particular story yet, so hearing the Mbira, which is such a pretty sound, and having them play their own was simply enchanting and beautiful.
Below is the story written out of the Rabbit and Lion, as adapted by Laura Simms.

Rabbit and Lion
Lion was the king of all the animals, but Rabbit was loved by everyone.  Rabbit was such a good musician that whenever the animals in the jungle heard his music they started to dance.  This made Lion so angry.  Lion said “I don’t dance, I don’t like to dance, I will never dance.”
One day Lion was walking in the forest and he saw Rabbit up ahead.  Lion decided to scare the music right out of him.  Lion went hiding in a tree and Rabbit came walking by.  Lion jumped out and roared so fiercely that Rabbit stopped in his tracks, his ears went straight up, his feet were stiff on the earth, his eyes grew wide and Rabbit started to shake.  Lion was pleased, he roared and bared his teeth, and then rabbit remembered his music.
He took his mbira which he always carried, little thumb piano, and he started to play.  At first this made Lion so furious that he opened his mouth even wider to roar, but what came out was a song.  Lion sang “I don’t dance, I don’t like to dance” but he was already moving to the music.  “I don’t dance, I don’t like to dance,” and rabbit just kept on playing.  Lion closed his mouth, and Lion began to dance singing all the time “I don’t dance, I don’t like to dance, I don’t dance, I don’t like to dance.”  And Rabbit walked back playing music, and Lion followed all the way.  Rabbit didn’t stop, Lion didn’t stop.  When they got to the edge of the forest Rabbit began playing the sweetest song and Lion sang softly… “no not me, I don’t dance, no not me I don’t like to dance, no not me.”  And Lion laid down while Rabbit softly sang Lion  to sleep.  When Lion was fast asleep, Rabbit stopped playing, he hopped away as quickly as he could.  Since then Rabbit stays as far away as he can from Lion.  As for Lion, if you ask him, he will always say, “I don’t dance, no, no, not me. Never.”

Wednesday, August 24, 2011

Making Pine Cone Sheep with Llama Wool

Making Pine Cone Sheep with Llama Wool


This was a delight to make and very easy for a preschooler or their parent.
For Elianna's birthday we had a farm theme, and although it was not a day at Art and Soul Preschool, I wanted to post this project to share.

This project was inspired by a post I found about weaving pine cones on Little Acorn Learning
They weaved yarn and loose wool around a pine cone, and we had recently recieved a huge bag of wool from our friend's neighbors llamas and I thought, why not weave the wool around the pine cone to make sheep.


You will need pine cones
Wool and Pipe Cleaners
Start by wrapping pipe cleaner around the front and back of the pine cone to make legs


After you have your legs, start wrapping the wool around the pine cone pressing it in so that it really sticks


When the sheep looks the way you like, you can use another pipe cleaner to coil around the head to make a face.

Elianna loved her little sheep!


Some left over friends from the party

I Love how different they all are

Friday, July 15, 2011

Bread Making Thursdays

Every Thursday we make bread at school, and it is a crowd pleasure so I thought I would share the recipe.


To make it easier when working with a lot of little hands at one time, I make sure to have everything available. I warm up the water before the children arrive.  I also have a large bowl for the bread set out, a smaller bowl for the water and yeast, several measuring spoons and cups.
They are all use to making bread at this point and so it goes smoothly, but when we started we talked
alot about keeping the flour in the cups and bowls and not making it snow on the floor, as well as using the palms of our hands to knead the dough instead of squiching our little fingers deep into it and getting stuck:) 

This is an adaptation of recipes I found on google while searching for Waldorf bread recipes. 
 It is really tasty and easy!

Ingredients:
4 cups of flour
1 teaspoon salt
2 1/4 teaspoons active dry yeast
2 cups of warm water
*1 tablespoon of honey and 1 teaspoon of brown sugar
OR
3 teaspoons of brown sugar (we have had better results with this)


We start by taking turns sprinkling the yeast in the water.  As we wait for it to bubble we then take turns adding flour with small measuring cups to the bowl.  This way everyone gets several turns scooping up the flour and adding it to the measureing cup.  Likewise we take turns pouring a little bit of the flour from the measuring cup into the bowl so everyone gets a turn doing that as well.  Then again, taking turns we add the salt and brown sugar.  ( if you are using honey, add that to the 2 cups of water before adding your yeast and then only add 1 teaspoon of brown sugar to your flour)  I mix the flour a little bit at this point making sure everything is sifted in. Next, everyone takes turns adding the yeast after they have watched it bubble.  They then get spoons and start mixing! 


For a final mixing I take over while they wash their hands, and I do a quick kneading of the dough.  we let it sit for 15-45 minuutes while we play.  After the dough rises each child gets a small piece to knead and shape as they wish.  I cook the bread at 390 degrees (my oven is a little off so 375 degrees should work in most ovens)  for 25 minute or until it is has a nice golden brown top.  Enjoy!!!

Flower Petal Sun Catchers

Everyday at Art and Soul we journey through the wonderful world of art and art making.  Sometimes it is just a sensory exploration of paint on paper at an easel, on a rock, in the snow, or on our hands.  Other times we find ourselves involved in printmaking, collaging, candle making or simply cutting paper for the fun and skill of using scissors and seeing how they deconstruct and manipulate paper.

I would like this blog to offer parents at home some projects that they can try out with their own children, or for parent's of the children at Art and Soul to see their children in the act of making the art they bring home or place in their school art books.   Enjoy the process.

Flower Petal Sun Catchers


Materials:
A heavy card stock or cardboard...in this case a pizza box worked well. 
Contact paper
Paints
Flower petals, feather, pictures, whatever flat object you would like to use.

The Process:
I cut the the card board into circles, but any frame shape will work.  I also cut two pieces of contact paper into circles, one the size of the cardboard frame and one the size of the opening. 

The children then get their paint palettes, which at the school are little trays that have deep sections in them so that they can experiment with mixing colors.  I also have the kids pick their colors, they know what they like and get very excited about having the option to pick the color paints they would like to work with.  We spend sometime before painting just letting them mix paints and explore.

Next, they were given their circles and they started painting right away.


After they finish their paintings we let them dry as we walk into the garden to get some flower petals to use.
As the children pluck the petals from the flowers, I attach the large circle of contact paper so that the sticky side is facing out. and then the fun of sticking the flower petals to the clear circle begins.


The next step is to place the smaller circle of contact paper on top of the flower petals face down.
Have the children smooth out the bubbles so that the  flowers preserve themselves better.


After the sun catchers are finished, the kids beaded wire hanger attachments.  As a jeweler I of course love seeing them bead, but it is a great way for them to work on hand-eye coordination, fine motor skills and concentration.


Monday, May 9, 2011

Wild Flower Paper Making


This is an old post revisited because we made our homemade paper yesterday and as always the children impressed me with their abilities and patience as each of the 8 kids waited their turn to use the blender and scoop out their paper.  Here is the original post from last year, though the pictures have not been updated, this show sour process:

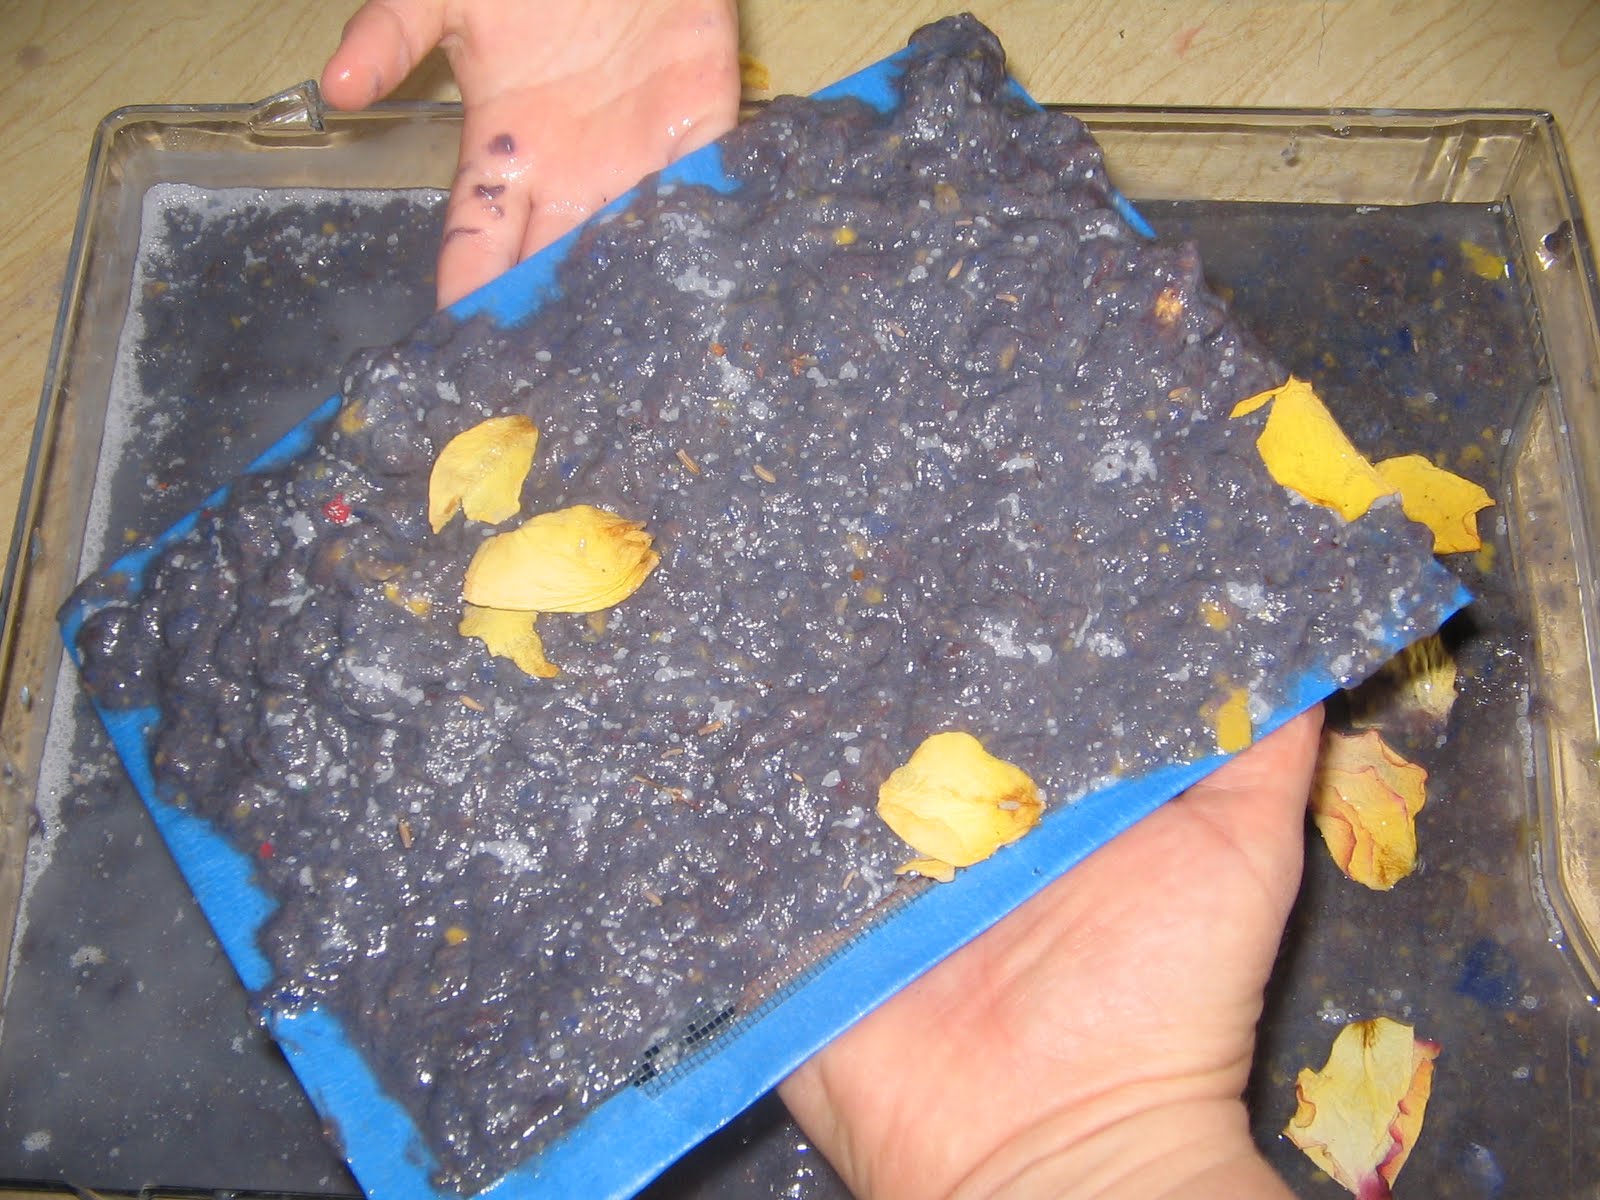
One of our recent activities at Art and Soul Preschool was paper making.  The children loved the process of choosing their colored paper pulp, blending it and sifting it out on a screen.  We have been studying seeds and plants, so we added wild flower seeds along with flower petals and lavender to our paper, making it an extra special treat.   We gave them away as Mother's Day cards, and Elianna and I planted ours in the garden.  They really came out beautifully, and I cannot wait for my wild flowers to grow. 


Bowls of paper pulp cut up from old paintings the students did on construction paper.
A very dirty, yet highly functional blender and trays of clean water in which the
paper pulp was added.  Each student used one side of the tray for their pulp.
Adding paper pulp to the blender. After the pulp is added, fill the blender half way with clean water.  The pulp should be cut up and soaked over night.


Pouring the paper pulp in the trays with about a 1/2 inch of clean water.
You can see where one student already poured the pulp on the left side.


Adding the wild flower seeds and petals to the paper pulp


Placing the screen in the pulp to pull the paper
Our paper ready to be laid on top of dry towels.  we placed a paper towel on top of each paper then folded the towels over to speed up the drying process.

After the paper has dried enough to peel it off the screen, we hung it up to dry fully

Lovely Wild Flower Paper
Elianna and I picked a place in our flower garden to plant our paper

Ellie working hard in the garden covering her paper with dirt

A final touch, a bit of water to help it grow!

Monday, March 7, 2011

A visit to The Campus Children's Center at UVM

In creating Art and Soul Preschool something simultaneously happened, a deep love and desire to make Art and Soul a Reggio Emilia influenced preschool.  Though we are small now, I know that this school will grow and with it the ability to really focus on the Reggio Approach.  

I have always wanted to be a part of making an interdisciplinary K-12 school, the thought of doing a preschool did not come to me until a year ago when I wanted to create a program for my young daughter to go to.   This past summer an opportunity to create a co-op preschool came my way, though that school did not take off, I was introduced to Reggio Emilia by one of the mamas.  It took me about a month before I was hooked.  I have been finding as many books as I can on Reggio Emilia and when I started Art and Soul, I knew that I wanted it to be a Reggio influenced school. 

Some of the aspects about Reggio Emilia that has me so excited is the emphasis on art, and not cookie cutter art, but a genuine sensory exploration of art and art materials.  Another aspect about Reggio Emilia that pulled me in is that this approach to teaching values children as whole, capable individuals.  It takes their interests and approaches the study of that interest from many different perspectives, and really engages the learner: teacher and student alike.  This to me is the precursor to an interdisciplinary school.  Taking an idea and applying it to many aspects of life, explorations and learning.

Aside from reading about Reggio Emilia, I wanted to see a school that used the Reggio Approach.  In one of the books I was reading I came across The Campus Children’s Center at the University of Vermont.  Just last weekend I went for a visit and was like a kid at Disney Land.  I was even taking pictures of their supply closet.  I would like to share these pictures because another wonderful aspect of schools that use the Reggio Approach is the thought and beauty they put into their environments.  It was truly and inspiring and overwhelming experience.  I can’t wait to continue to transform my space!

infant room
Construction Work Bench
Tools out for kids to use
Play area in Toddler Room

Dramatic Play Area...I really wanted to play here
Mirrored Ceiling Panels in the Studio
Colored Window Hangings in the Infant Room.
 I wish it wasn't snowing to see how they cast light and color in the room
Loft and Hide Out in Preschool
I love the simple-clean look to everything.  It felt like someones house rather than a school.
This is a great thing for me since I am doing this out of my home.


Items on shelves in the storage closet.
I love these pictures for the ideas of what you can present to children,
but also the way in which they are presented. 
Reggio has this way of making things visible and accessible which
is wonderful and empowering for children.